Universe of technology…
Networking
Bulk Approval of Updates in Windows Small Business Server 2008 and 2011
413 years
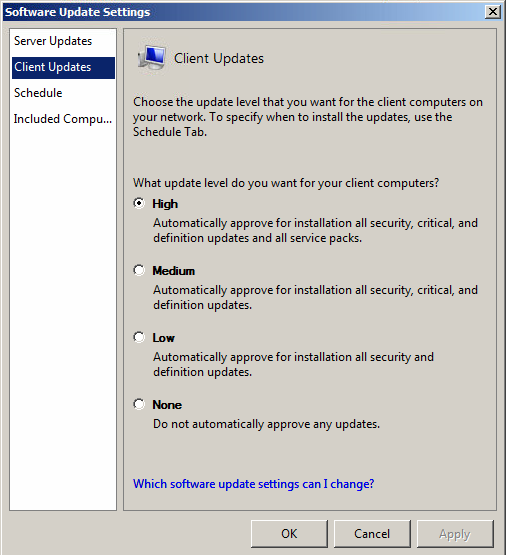
Most updates can be auto approved using an option in the SBS Console
The inclusion of WSUS in Windows SBS (Small Business Server), is extremely useful for larger small business networks of more than 5 machines, and provides functionality for installation of all applicable Windows Updates to all machines on the network.
Updates can be set to be auto-approved by the SBS Console by selecting the High option in the Software Update Settings dialog. However, optional updates can never be auto-approved.
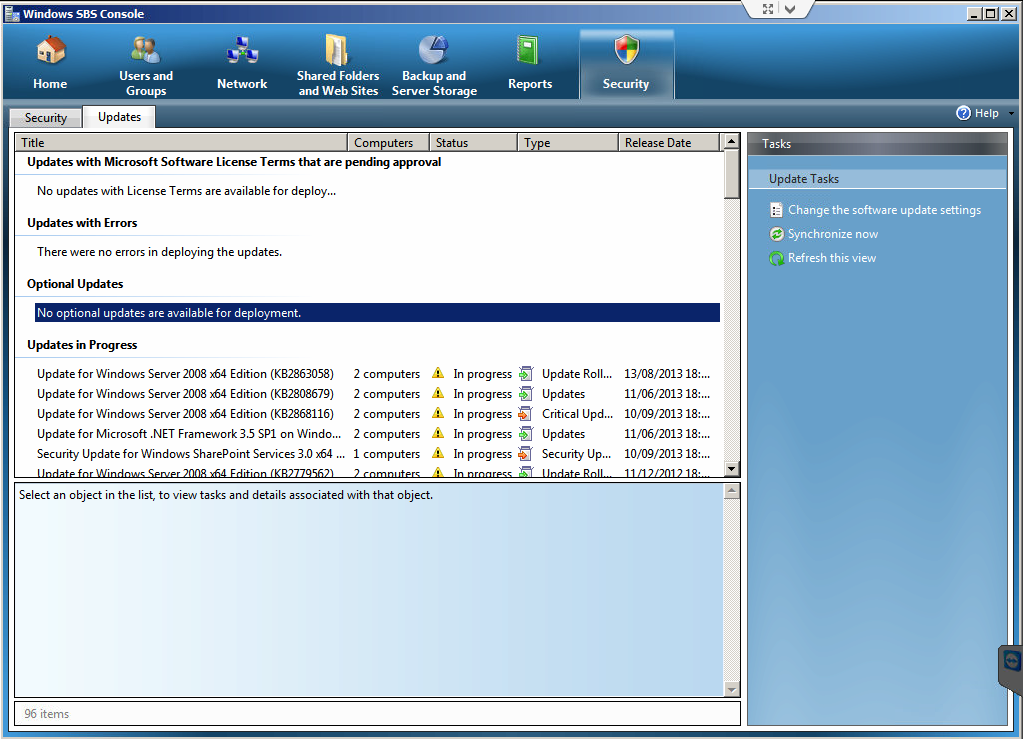
I came across a server recently with over 100 unapproved optional updates, including Internet Explorer 9/10. So in this scenario, I thought… “OK, I’ll just hold the shift key, and select them all”.. but no. In Microsoft’s infinite wisdom, this time-saving feature is not deemed important enough. Sigh.
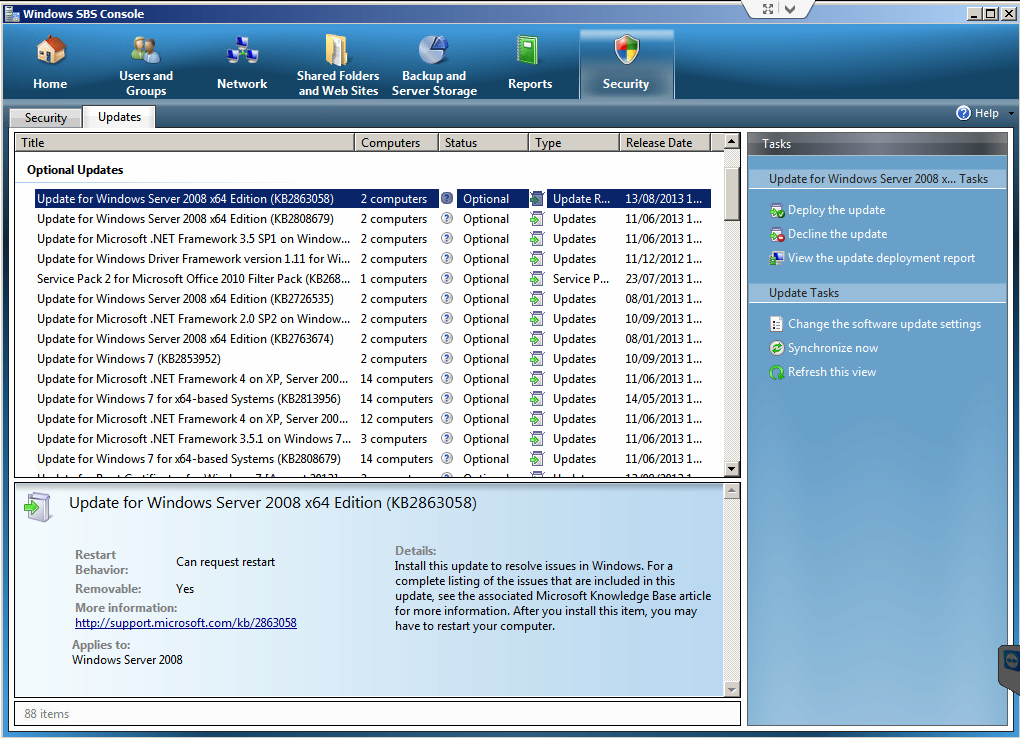
Several optional updates can pile up over a short period of time.
So, I was obviously not going to sit there clicking each update, approving it, and acknowledging two message boxes, and then waiting 10-15 seconds for the list to refresh, that would be like picking rice krispies off the floor one by one, painstaking!
To get around this problem, you can use the big boys’ tools provided by WSUS, known as the Update Services Console.
As many admins will know, SBS is a very specific and highly tuned installation of Windows Server, Exchange, WSUS and Sharepoint, so it’s not recommended to go fiddling about with stuff behind the scenes which can otherwise be done in the console, otherwise you may end up having to follow one of these repair guides. However in this situation, I think we can safely approve some updates using the native WSUS tools, however there are a couple of things you do have to watch out for.
Approving Updates
SBS’s WSUS Computer Groups
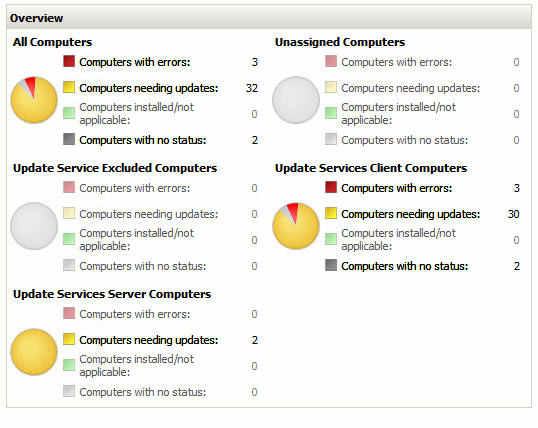
SBS creates three additional groups which it uses to control which machines receive updates, and which don’t (see right). They are fairly self explanatory, Excluded Computers can be controlled via the SBS Console, Client Computers are machines running XP, Vista, 7 or 8, and Server Computers are servers. Unassigned Computers is a default group, and is not normally used in SBS.
To approve remaining optional updates, select All Updates from the left pane, and select Unapproved, and Failed or Needed from the two drop down lists at the top of the window.
After clicking the Refresh button, you should see a similar number of updates to what is displayed in the console.
In this view, you can now use the Shift and CTRL keys to select multiple updates. Scroll through the list and select all updates which are applicable to client machines (i.e XP, Vista, 7 or 8), including any other software such as Office, and… believe it or not, Skype.
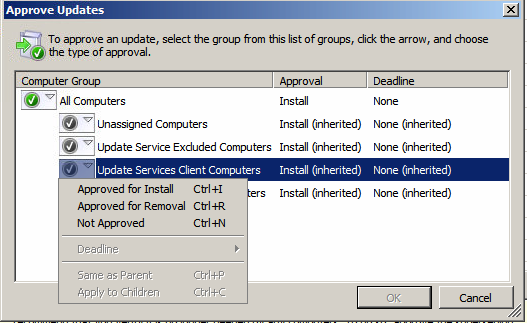
Select the appropriate group to approve the updates for.
Click the Approve button on the actions pane, and under Update Services Client Computers click the button, and select Approved for Install. Click OK, accept any license agreements, and after a few seconds you should see them all approved. Click Close, and then refresh the list. Do the same for all the server updates, except choose Update Services Server Computers.
There are some updates which may be applicable to both groups. If you are in doubt about any updates, go back to the SBS Console, refresh the list, and approve them there.
You should now end up with a clear list!
All updates have now been approved.

SQL Custom Ports
016 years
 I’ve been setting up an SQL Server for a small business, and since our server company has blocked the default port, I have had to choose an alternative. After configuring the ports in various places – Windows Firewall, SQL Configuration Manager – I found that whatever I did would not work.
After a bit of searching, I found the answer.
When entering the server name into the field, instead of using the traditional ‘host:port’ scheme, Microsoft have decided to use a non-standard approach.
The correct naming scheme is: Host,Post\InstanceName (note the comma!)
Try it, worked for me. Leave a comment if you can’t get it to work.
Recovering from EM Mode – Buffalo LinkStation Live HS-DHGL NAS
2416 years
by Luke Stratton
in Networking

I recently came across a problem with a Buffalo LinkStation Live.
When I plugged the NAS into my computer, and ran the Buffalo NAS Navigator, it reported that the drive was in ‘EM Mode’. After several hours of fiddling around, I eventually managed to get it up and running again.
The only way to do this is to either upgrade or flash the firmware. Don’t worry, the process is safe and shouldn’t damage any of your data.
Here’s how I did it (you must have a Windows PC to hand to perform the operation):
- Make sure that there are no other devices on your network which may interfere with the LinkStation, such as a firewall, or another NAS Drive.
- Directly connect the drive to an ethernet port on the network.
- This step is crucial for the operation to succeed. Open up Buffalo NAS Navigator, and click ‘Refresh’. Once the EM drive appears, right click it, select Properties and change it to an IP Address which is not currently being used. It may ask for a password, leave the box blank, and press enter. If leaving the box blank does not work, you will need to enter your current password for the drive.
- Once the drive is on a Static IP address, you will need to download the latest firmware for the product from Buffalo-Technology.com.
- After this has been downloaded, open up ‘LSUpdater.exe’. Select your NAS from the list and start the process.. The process takes approximately 10-15 minutes. DO NOT unplug the drive until the upgrade has completed. If the upgrade failed, try running again. It took me two attempts to get it working on one occasion.
Hope this helps.
Please note: I accept NO responsibility for any lost data, since it is your own choice if you decide to take the steps above. I am simply providing them as a reference/help to anyone who has the same problem.